Ceramic Tile For Kitchen And Bath
Ceramic Tile For Kitchen And Bath
This is an excerpt from the Book called “Improvement and Renovation” by Bob Vila. Continue reading to learn more about Ceramic Tile For Kitchen And Bath, thanks to the author.
Impervious And Permanent
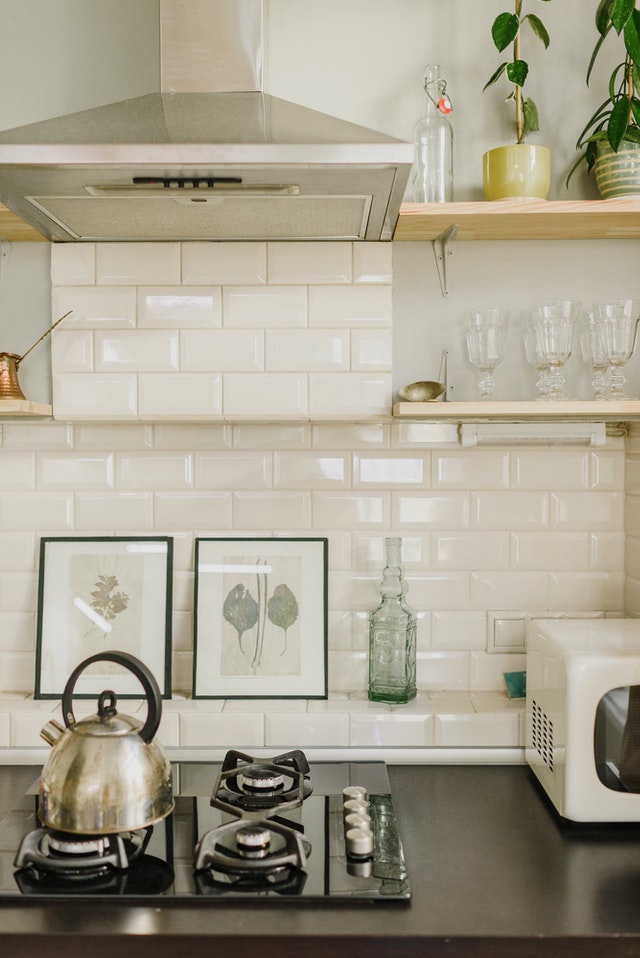
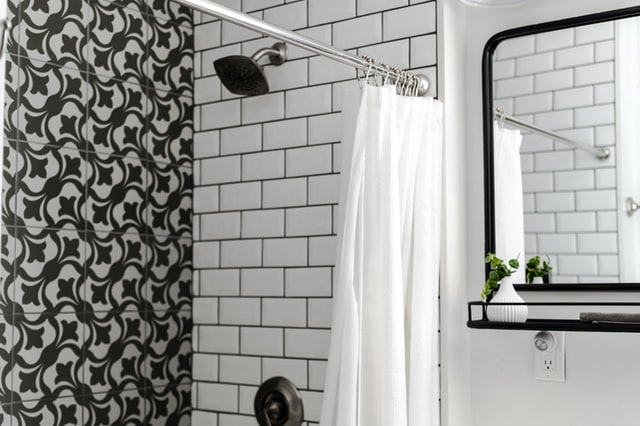
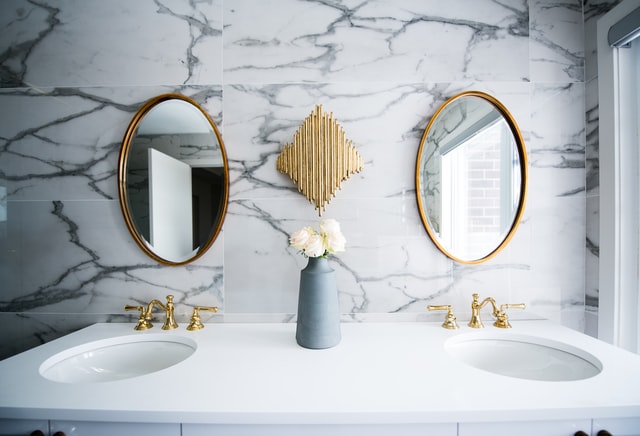
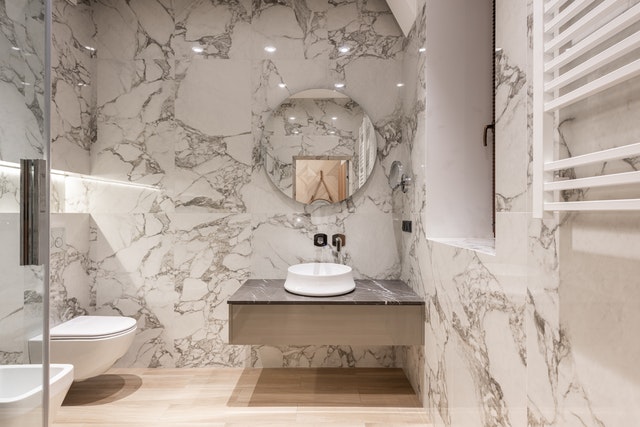
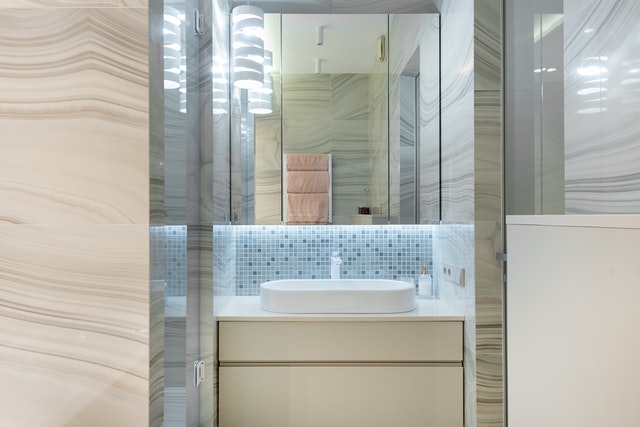
Ceramic tiles of tough fired clay make a durable, beautiful, impervious surface for kitchen and bathroom walls, floors or countertops. Smooth and shiny glazed tiles are commonly used on walls and countertops; unglazed by wear, are better for floors.
Tiles are usually square or hexagonal, range in size from 1 to 12 inches square and come in a wide selection of colors. In addition, a variety of trim tile is available. Most tiles have projections on their edges to space them from their neighbors. Some are designed to fill interior corners where two tile surfaces meet; they are often used instead of baseboard on tiled walls. Other types of trim tiles have rounded edges to give the last row of a surface a finished look or to go around corners and the counter edges.
Laying ceramic tiles involves preparing a smooth surface, planning a pattern and attaching the tiles with adhesive. Tile adhesives include cement-based mortars (most commonly used over a concrete subfloor as shown), epoxies, latex-mortar and epoxy-mortar combinations and organic adhesives. Most popular with amateur tilesetters are the organics, which are relatively inexpensive, work well for residential tiling, require no mixing and are easier to apply than epoxies.
When buying adhesive, consult a dealer and read the label on the container to make sure the product fits your needs as to bonding ability, setting time and water resistance. Most tile adhesives will bond tile to most other surfaces, but there are exceptions.
Floor adhesives usually harden more quickly than wall adhesives. Thus you can spread adhesive over a large area of wall before setting tile; you must spread floor adhesive a little at a time, but you can walk on a floor 24 hours after tiling it.
Wall adhesives are either Type I, which resists prolonged wetting and should be used around tubs and showers, or Type II, which stands up to intermittent wetting and can be used behind and backsplash. Before tiling any surface that will be wetted frequently, seal it with a thin coat of adhesive.
Mix mortar-type grout to the consistency recommended by the manufacturer. Mortar-type grouts must dry slowly to “cure,” or harden properly. Some floor tiles steal water from grout and impede curing. Before grouting, put a drop of water on the back of a tile; of the tile soaks it up, use more water in the grout.
To make floor grout joints flush with tile surfaces fill the joints with a grout containing a water-retaining aggregate, sprinkle dry grout of the same kind over the grout joints and rub the joints with a piece of burlap, using a circular motion.
After tiling a floor, cover it with polyethylene sheeting. If no condensation appears under the sheeting the next day, remove it, sprinkle water on the floor and replace the sheeting. Let the grout cure for three days. After 10 days seal the grout joints with a sealer sold to protect the grout from dirt or mildew.
For easier installation, small tiles called mosaic tiles are sold attached to sheets of paper or mesh 1-by-1 or 1-by-2 feet in size. Larger wall tiles also can be bought in sheets. A dealer will tell you how much tile you need if you bring him a sketch showing the shape and dimensions of the area to be covered. Be sure to get enough—and a little extra. Colors and patterns come on and go off the market fairly frequently and even the same color may vary from batch to batch.
Only simple tools are required—a level and chalk line for laying out tile work, a square for keeping it straight and a notched trowel for spreading adhesive. Buy a trowel with notches the size and spacing specified on the label of the adhesive container. For cutting the large unglazed tiles called quarry tiles, rent a heavy-duty tile cutter such as the type used by professionals. For glazed tiles you can use a glass cutter for scoring straight cuts, and for cutting curves and angles get a pair of nippers, a cutting tool similar to pliers that nibbles away tiles a bit at a time. A carbide-tipped hole saw can save you time and work in making large numbers of round holes, as for fitting tile around pipe. Protect your eyes with safety goggles when using nippers or a hole saw.
Fitting the pattern to the kitchen or bathroom
Planning a pattern for a floor. Lay a row of dry tile-or squares of tiles-from the middle of a doorway to the opposite wall, guided by a string nailed from the doorway to the wall. If a gap of less than half a tile width remains at the end of the run, remove the first tile and centre the remaining tiles. The resulting spaces left for the two border tile will equal more than half the width of a tile, avoiding awkward cuts on tiny pieces.
If the room has a second doorway, run a second row of tiles inward from this doorway until it nearly reaches the first row of tiles. Slide the first row over until its edge meets the last tile of the second row. Snap intersecting chalk lines as a guide for laying the tiles.
Planning a countertop pattern. Lay a row of dry tiles across the front edge of the counter. Lay a second row perpendicular to the first from the front edge to the backplash. Adjust the positions of the two rows as at left above so that border tiles are even. If only as small amount of space remains at either of the borders, arrange the tiles slightly farther apart and plan to fill the spaces between them with grout after the tiles have been cemented in place.
Positioning tiles on a wall. Since horizontal features-tub rim, floor edges, floor cove moldings or countertop-are almost never truly level, use a level to find the lowest point at which the feature meets the wall. Measure one tile width above this point, plus ¼ inch for clearance under the tiles, and snap a chalk line the length of the wall. Find the highest point of the horizontal feature and measure its distance from the chalk line. If this distance is within 1/8 inch of a tile height, align the tops of the first row of tiles with the chalk line and vary the size of its joint line beneath the tiles. If the distance from the high point to the chalk line is not within 1/8 inch of the tile height, trim tries tiles to fit between the line and the horizontal feature.
Determine the width of border tiles by measuring the length of the wall and calculating how many whole tiles will fill that space while leaving room for borders more than half a tile wide.
The tricks of cutting
- Cutting border tiles. Lay a dry tile over the last fixed tile next to the border. Place another dry tile on top of it and move the second tile to the wall leaving a grout-line space equal to that between other tiles. Mark the first tile where the top tile overlaps it. This portion should fit the border space. Cut at the mark with a tile cutter or score the tile with a glass cutter using a straightedge as a guide. Place the tile over a pencil, lining up the pencil with the scored line on the tile. Press gently on both sides of the tile until it breaks. If the tile is scored too close to the edges to break easily, use tile nippers.
Making irregular cuts. When cutting tile to fit around a doorjamb or other irregular area, first mark the line of the cut. Holding the tile glazed side up, use nippers to nibble away the unwanted part of the tile. Practice using nippers on waste tile before making an unfamiliar cut. Take tiny bites less than 1/8 inch at a time to avoid breaking the tile. Smooth the rough-cut edges with an abrasive stone or a file.
Cutting holes. To cut a hole with a special carbide-tipped hole saw, fasten the tile glazed side down to a plank by driving nails partway in on each side(left). Cut slowly, using firm but not heavy pressure. To fit the tile around a pipe you cannot remove, cut it in two through the middle of the hole. To cut a hole with nippers, outline the hole on the face of the tile, cut the tile through the centre of the outline and use the nippers to nibble out the marked area. When the pieces are installed, only a hairline will show between them.
Setting separate tiles
- 1. Preparing the surface. Spread adhesive-using the kind of adhesive appropriate to your particular surface-as thinly as possible with the unnotched side of the trowel. Avoid covering reference lines. Let this skim coat dry.
- 2. Applying adhesive. Spread adhesive over an area of about 10 square feet with the notched edge of the trowel, holding the edge against the surface at a 450 Use only about a cup of adhesive at a time so that adhesive flows freely from the notches. Avoid covering reference lines.
- 3. Setting tiles. Start setting tiles at reference lines9Right) near the middle of the room and work toward walls. Press each tile in place with your fingertips, twisting it slightly to set it into the adhesive; do not slide tiles into place or adhesive will fill the grout joint and make grouting impossible. When setting thick tiles with indentations on the backs, apply adhesive also to the back of each tile. Butt the spacing lugs on the edges of the tiles tightly together for a proper fit. Check alignment frequently with a straightedge.
Cut each border tile individually as you reach the end of a course, since border spaces may vary slightly. Remove adhesive from the faces of the tiles with the solvent recommended by the adhesive manufacturer.
- Beating in the tile. Pad a scrap of 2-by-4 the length of three tiles with several layers of cloth. Put this beater, padded side down, on the set tiles and tap it gently with a hammer several times along its length. Beating the tiles sets them more firmly into the adhesive and helps to ensure a level floor. Let the adhesive harden for 24 hours before grouting. If you must walk on newly laid tile, cover it first with plywood.
Setting sheets of tile
Backed tile. Some tile comes in sheets several tiles square, the tiles attached to one another with flexible grout. Set sheets of backed tile, using the techniques shown for individual tiles. If one or more tiles in a sheet must be cut to fit around pipes or fixtures, cut the affected tiles out of the sheet with a razor blade and trim away the cut grouting. Set the remaining tiles in the sheet, then cut the detached tiles to fit around the obstacle. Set the cut tiles and, after 24 hours, regrout around them with silicone rubber grouting.
Mosaic tile sheets. Most mosaic tile comes in sheets held together not by grout but by paper on the face of the tiles or by mesh on the back. Roll up the sheet with the back of the tile on the outside. After troweling on adhesive, place the free edge of the sheet where it is to be set and gradually unroll the sheet, pressing the tiles gently into the adhesive. Do not slide sheets into place. Space sheets the same distance apart as the tiles in the sheets. The mesh on mesh-mounted tiles remains in place under the tiles; the paper on paper-faced tiles is removed after the tiles are set by dampening it and peeling it off.
When mosaic tiles must be cut to fit a space, cut the affected tiles out of the sheet, then trim them as necessary and set the cut tiles individually.
Finishing techniques
Grouting. Mix grout to the consistency specified on the label. Trowel it into the joints and spread it with a window-washing squeegee or stiff card-board. After about 15 minutes, wipe up excess grout with a damp sponge, rinsing the sponge frequently. When all grout has been removed, let the tiles dry; polish with a soft cloth.
Applying silicone grouting. Use a caulking gun with the tip cut at a 450 angle to grout between sheets of backed tile with mildew-resistant silicone rubber seal. Fill joints to the same depths as the grouting between tiles. Also grout around any tiles you have set individually. When the silicone rubber is tacky, clean the tiles around the joints, using alcohol on a soft cloth.
Sealing grout. A good way to keep grout joints from becoming discolored by dirt or mildew is to seal them with a penetrating-type liquid water-repellent sealer after the grout has cured for 28 days On walls, apply the sealer to the grout joints with a small brush such as a watercolor brush. On floors, spread the sealer over the joints and wipe up any excess with a soft cloth.
Sealing tile flooring
Sealing the flooring. Apply a commercial tile sealer periodically to the flooring to help protect it and ease regular maintenance. Consult a tile dealer for the tile sealer recommended for your type of flooring; if it is of glazed tiles, a tile sealer is not necessary. Clean then tile flooring using a nonacid commercial floor cleaner, then follow the manufacturer’s instructions to prepare and apply the tile sealer. Wearing rubber gloves, work from one end of the flooring to the other end of it on a small section at a time, wiping the tile sealer onto the surface with a clean, soft cloth or mop; do not pour the tile sealer directly onto the flooring. Apply only a thin, uniform coat of the tile sealer and wipe off any excess; allow the flooring to dry overnight. If the flooring is of glazed or other tiles that do not require sealer, apply a commercial grout sealer of liquid silicone to the grout. Following the manufacturer’s instructions, spray the grout sealer onto the surface or apply it with a soft cloth, immediately wiping up any excess; allow the flooring to dry overnight.
Accessories for bathroom walls
The essential bathroom accessories-soap dishes, towel bars and toilet-tissue holders- and many less essential ones are available in three types. Flush-set accessories mount on the wall much like tile or paneling; they are installed at the time the wall covering is applied. Recessed accessories, applied at the same stage of wall finishing, are, as the name suggests, fitted into holes in the wall. The third type, surface-mounted accessories, can be installed at any time over the wall covering; some are merely glued on, but the ones held by screws and mounting clips are generally sturdier. The methods of fastening the accessory to the clip depends on whether the accessory is ceramic or metal.
Vertical or L-shaped grab bars, resembling towel racks but more sturdily mounted, are a useful addition to any bathroom. Like other surface-mounted accessories, they are fixed on top of the wall covering. But plastic anchors should not be used to hold the mounting screws for a grab bar. Some people use hollow-wall fasteners, but it is better to screw a grab bar directly into wood blocking placed behind the wall at the time of framing the room with studs and other supports.
If a wall is being tiled, flush-set accessories are generally installed. Leave an opening for them at the time of tiling, cutting tiles as needed to trim the edges of the space. When setting or replacing a flush-set accessory, use plaster of Paris rather than tile adhesive to bond it to the wall. The plaster grips every little crevice slightly as it sets, strengthening the bond.
Recessed accessories can be installed in any wall that can be cut, and are suitable for tiled walls if a space for them is planned and the underlying material is cut before tiling. The small opening in the wall must be cut to the same dimensions as the accessory’s recessed part, the edges at least 1 ½ inches from a stud.
Surface-Mounted Pieces
Drilling tile. Locate accessories so that their screw holes are as near to the centers of tiles as possible. Use rubber cement to stick a piece of thin paperboard, such as a file card, where the accessory is to be fastened. Hold the mounting clip for the accessory against the card and mark the screw holes. Drill with a masonry bit and a variable-speed drill at low speed; apply light p[pressure to avoid breaking the tile. After the holes are drilled, peel the paperboard from the wall.
Installing Ceramic accessories. Screw the metal mounting clip into plastic wall anchors, setting it with its thickest end up. Slide the accessory down over the wedge-shaped clip until it fits snugly against the wall. Grout the joint between the accessory and the wall.
Installing metal accessories. Attach the clip to the wall as shown above, with its angled parts at top and bottom. Place the setscrew in the bottom of the accessory Slip the top of the accessory over the top angle of the mounting clip and drop the bottom of the accessory over the bottom of the clip. Tighten the setscrew against the bottom of the clip with a small screwdriver.
Flush-set Accessories
Mixing the plaster of Paris. Add water slowly to a pound of plaster of Paris in a mixing bowl, stirring constantly. Mix just until the material holds its shape and peaks in the bowl like stiffly beaten egg whites. Avoid excessive stirring; too much air in the mixture will speed setting time. Trowel about a ¼-inch layer onto the back of the accessory, slightly thinner toward the edges.
Setting the accessory. Press the accessory firmly against the wall while wiggling it to force the plaster of Paris into irregularities around and behind the adjacent tiles. Wipe off plaster that oozes out the sides of the front flange. Hold the accessory in place until the plaster stiffens, usually a minute or two. The next day, grout around the flange.
Recessed accessories
Positioning the hanger bracket. To install a recessed accessory that was planned before the wall was surfaced, screw it directly into wood blocking between studs. For installation after the wall is surfaced, cut and finish the opening, then use a winged bracket to secure the accessory behind the wall. Slip the first coil of the brocket sprang over the center of the bracket with the remainder of the spring pointing away from the spread tabs. Angle the bracket into the recess, spring first, and position its tabs against the back of the wall surface. The spring, pushing against the far side of the wall section, will hold the bracket in place.
Mounting the accessory. Place a bead of colorless caulking compound around the black of the front flange on the accessory. Insert the accessory into its opening. Put one of the mounting screws through the accessory and engage it in the slot in the mounting bracket. Tighten the screw a turn or two. Do the same with the other screw and then tighten both of the screws to hold the accessory in place.