
How To Repair A Cracked Bathroom Sink
How To Repair A Cracked Bathroom Sink
Repairing a crack in a kitchen sink, a bathroom sink or an old porcelain enamel sink following the impact of a heavy object is easy to do. To do this, you will need to apply a two-component epoxy resin, sand, and then repaint the sink with an epoxy paint.
Cracked sink: how to fix it easily
There are two reasons that can lead you to repair a cracked sink:
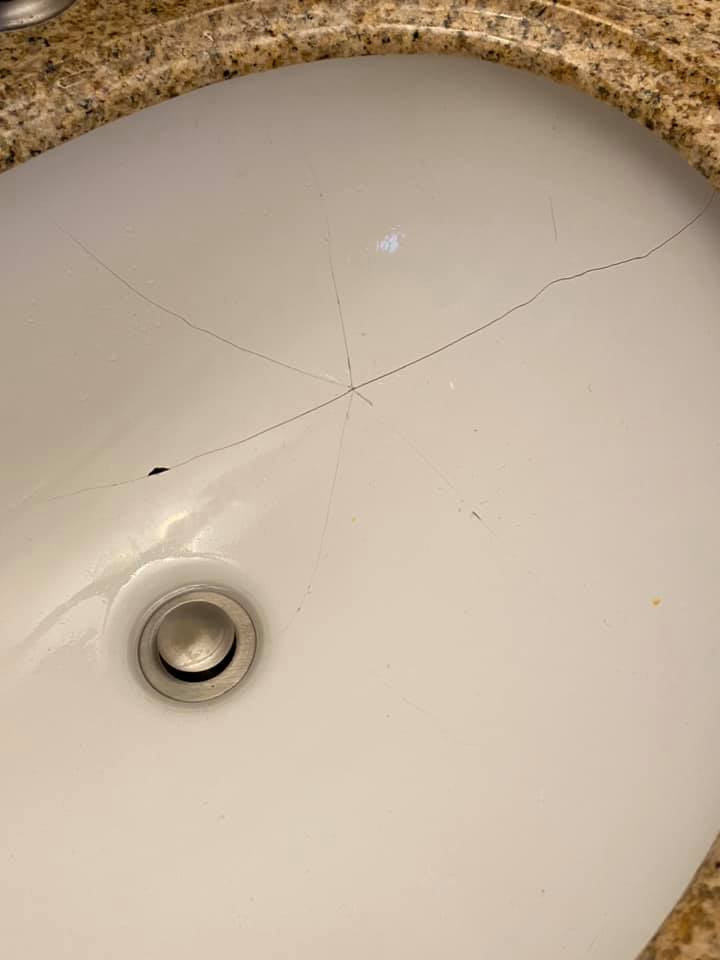
The shock of a heavy object: a bottle of perfume slips from your hands and cracks in the porcelain sink in the bathroom or a heavy cast iron pot cracks the kitchen sink when it falls.
The renovation of a porcelain enamel sink: you have found an old cracked porcelain sink in a flea market, and you would like to use it in your renovation project but first you need to repair it.
In short, to repair a crack or impacts on a porcelain enamel sink, we will be using two-component epoxy resin. It is a kit consisting of two pastes or two gels (depending on the manufacturer) that must be mixed together and then applied to the surface to be repaired.
In order to hide the repair, because the applied resin will be visible like a patch, we will have to repaint the sink or the sink with a specific paint.
Stages of realization
- Prepare the sink for repair
- Sand the cracked sink and prepare the resin mixture
- Apply the epoxy resin and sand the repair
- Apply epoxy paint to the sink
1. Prepare the sink for repair
Note that if the sink is already disassembled, the task will be much easier.
Disassemble the sink
- Disassemble the sink from its location.
- If the porcelain enamel sink has accessories such as a drain, siphon, overflow grid, or a faucet, these should be removed as well.
- Use an adjustable wrench, a set of screwdrivers and/or water-pump pliers, and carefully remove the accessories on the sink.
De-grease and clean the sink
- Before applying any repair product, the porcelain must be clean.
- Use personal protective equipment then, using suitable cleaning products and sponges, clean, and de-grease the sink. Do it twice. This is not a usual hygienic cleaning, but a preparation for the restoration. It is therefore necessary to insist.
2. Sand the cracked sink and prepare the resin mixture.
- Sand the sink and the area to be restored
Lightly sand the enamel of the sink over its entire surface with sandpaper.
- Then sand the area to be repaired further.
Clean to remove all traces of dust on the surfaces.
3. Apply the epoxy resin and sand the repair
Resin application
- Apply the mixture to the crack to be repaired and any other points of impact to be restored with a suitable spatula.
- Leave to dry for the time indicated on the instructions.
Resin sanding
When the resin dries, put on the protective equipment again, especially the respiratory protection mask (fine resin dust is very harmful), then with the sandpaper, sand the resin until a smooth surface is obtained.
4. Apply epoxy paint to the sink
The resin will not be quite the same color as the enamel on the sink.
- Using a porcelain enamel fixture epoxy paint kit and a foam paint roller, apply the product to your sink surface following the instructions given on the kit.
- Wait for the paint to dry.
The sink repaired and restored, all you have to do is put it down.
Get in touch with a professional
Trendy Bathroom Remodel Works is one of the best remodeling company in Vacaville CA. It carries out all bathroom remodeling works for individuals, property managers, and condominiums, as well as for professionals. Their quotes are precise and detailed, indicating the work that will be done in your home.
Contact us today: 7072046518
Read our next article “How To Repair Bathroom Wall Water Damage“